Welcome to my blog! I'm an aircraft enthusiast, ex-Air France ground crew, published aviation author and humble 'kit assembler'. As my friend Mark says, 'I just like models'. I attend a couple of clubs regularly and do try and post here as often as I can. Still on the bench is the new-tool 1:48th Airfix Jaguar GR.1
Wednesday, 22 August 2012
Zvezda new tool 1:72nd scale Bf 109 F-2 Friedrich (2)
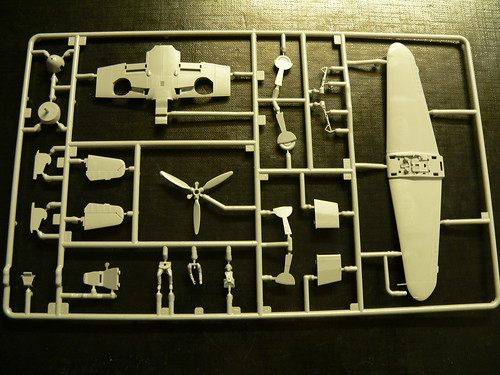
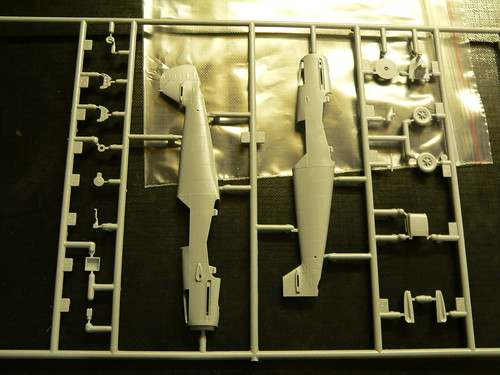
..nicely detailed parts just snap together and/or plug in....no glue required ..and no gaps either. Is this the end of modelling as we know it ? Shame the supercharger intake is solid and the pitot tube attached to the port wing simply won't survive the handling and painting stages. Once the lower wing insert is clipped on, construction proceeds with the cockpit. The various detailed parts - including a three-part pilot figure - just plug into the top of the wings and the fuselage halves then clip onto the wing around the cockpit....however the wings are just solid parts and there is no provision for deploying flaps/slats or ailerons at all... I think if building this again I would at least cut out the radiator flaps which are invariably down when the aircraft is on the ground ...but those are the only criticisms...
Sunday, 12 August 2012
new tool 1:72nd Airfix P-51D Mustang- first one finished
This is " Lollipoop II " a 100 FS machine of the 332nd FG flown by Lt. Spurgeon Ellington out of Ramitelli, Italy in late 1944. Click on the images to get in close...
Difficult to go to far wrong with a nice new tool Mustang! Careful with the canopy though as it is definitely the weak point of the model in my opinion, that is, when you've finished wrestling with the wing fit. It is very easy to spoil the model by marking the clear part of the hood when you remove it from the sprue and it still looks rather thick when attached to the `solid’ canopy rail. In addition the windscreen on my model was very tight and hard to fit to the fuselage. It might be an idea to use a spare canopy out of the spares box if you have one, but the rest of the kit is great and the dropped flaps are excellent. The drop tanks are the only other 'weak' point - they lack the very characteristic 'seam'. The decals are went on perfectly, although I didn't use the yellow bands or the red trim, preferring to mask and paint. I still have some small stencils to put on but otherwise this one is finished. Tamiya quality at half the price. Now to start on the 'starter set' of this kit with RAF markings for 112 Squadron complete with `sharks mouth’.
Sunday, 5 August 2012
Zvezda new tool 1:72 Bf 109 Friedrich
..retailing for £7.50 in the UK this is the neat new-tool Friedrich from Zvezda. Designed like their Yak-3 - which is an excellent little kit- to be a 'snap-together' easy build, parts seem to be well detailed.
From AaCee26 on britmodeller.com
"...I got mine yesterday. Excellent little kit! Very easy and quick to build. I compared it with the FineMolds kit and in my opinion Zvezda is even better! Look for example the cowling piano hinge! Worst pitfalls of the FM have been avoided (narrow oil tank after the prop and a little low fuselage on wing trailing edge) so the minor issues with Zvezda are easy to accept (a couple of panel lines missing on top of the wings, closed air intake). If only flaps have been dropped and there would be other sub-types available..."
photos by 'neurodancerus' via flickr' hot-links available to google bloggers


Friday, 3 August 2012
new tool Airfix P-51 D Mustang, Mustangs at Duxford flying Legends 2012
Some progress on the Airfix P-51 and to conclude this post some of my mate Nico's excellent pics from this year's Flying Legends (click on the pic for a larger view). Finally got the wings on after a fair bit of fettling; in the end I had to shave the lower wing/fuselage join at both ends (front/back) of the lower wing part to get the lower wing on. I elected to assemble the wing in its entirety and fettled at the wing root, taking care to maintain the lower wing dihedral - perhaps next time I should do it differently and attach the lower wing first. At the last count I've built five or six Airfix new tool Spits and two new tool Emils but this was the most difficult wing assembly of the Airfix new tools for me. The fuselage and cockpit parts went together perfectly though. However I was so intent on getting the wings on I completely missed fitting part 11a inside the fuselage - the detailed radiator - so now I've got a 'see-through' Mustang! I'll put it down to ham-fistedness and do it differently next time..fabulous little kit (again) though despite one or two quality control issues again.
One suggestion for the wing fit I've read courtesy Mikeyw on britmodeller; " The only fit issue I've had with this kit is the wing/under engine joint. I put this down to the top of the wheel well interfering with the thickness of the wing fillet. It was a simple cure by whittling down the forward half of the wing fillet's thickness by about half. It's not much but it allows the roof of the wheel well to tuck in enough to allow the extension of the wing/engine rear to sit in place rather than have to be stretched, glued and clamped. My general comment to Airfix would be to please use a plastic that cures a LITTLE harder. I really love the seperate rudder and flaps. How about setting the standard Airfix and make all the control surfaces as seperate parts ! "
Subscribe to:
Posts (Atom)


