Showing posts with label Focke Wulf Fw 190. Show all posts

Tuesday, 27 October 2026

Get the 'sit' of your Fw 190 right..


An SG 3 Fw 190 A. Click to view in full screen mode. (ECPA-D KBZ 24 F327)


Most modellers know what a Focke Wulf 190 looks like, don't they? Why then do they go and do this? Beautifully finished in the makings of the 'Eismeer' Geschwader JG 5, but with nothing done about the ridiculously elevated stance. I don't even blame the modeller here really, this is down to the kit, probably another Eduard iteration.... 


Perhaps the thought of surgery on the gear legs was too awful to contemplate, perhaps the modeller had to get the kit finished for the table (photo taken at the IPMS West Norfolk show back in June) and put it together OOTB. Not only do the gear legs have to be shortened, they have to be raked forwards and obviously inwards. Looking down on the wing from directly above you should be able to see the wheels ahead of the wing leading edge. Yet model companies - especially Eduard - continue to produce Fw  (and Me 109) undercarriage under no compression - as if you ever see them like this ..anywhere.. All you really have to do is take a mm or three out of the leg and glue it back together, perhaps inserting a small metal pin. Easy enough to do using a hand-twist micro drill...If you need to slightly 're-position' the leg in the well to rake it forward use a small circular spare part, a 'ring' to locate it..the sort of part you attach to the back of a prop to stop it falling out of an engine. Small enough to sit in the gear well and take an undercarriage leg.

 Here's another recent completion of the Airfix 1:72 Fw 190. I used the EagleCals JG 5 Eismeer decal sheet. Obviously gear leg 'surgery' is a little less daunting in the smaller scale and probably isn't really necessary on the Airfix.. but I did it anyway...


Above; Fw 190 with Stammkennzeichen (factory radio code) TI+DQ was an Fw 190 A-1. In the sequential block allocations used by the Luftwaffe, this specific four-letter registration code was painted on the fuselage sides of the early A-series production model during its factory and acceptance testing phases before being assigned to a combat unit. It is part of the same factory code sequence that included nearby prototypes and early testing blocks, such as the TI+IG and TI+IH codes used on the Jumo-engined high-altitude Fw 190 V-prototypes. Note in this view the inward 'cant' of the starboard leg in particular. 

Below; A few more Focke Wulfs seen at the same IPMS show - what do you think about the 'sit' on these ?

At the ECPA-D photographic archive in Paris, the 'fonds allemand' (German collection)  has a host of PK images taken during early 1944 in the East. This image shows a Focke Wulf Fw 190 F-8 of SG 3 being bombed up. Click on the image to view in full screen mode. From the KBZ 240 files. 


Friday, 9 October 2026

Eduard Fw 190 A - 'old' new-tool. What a dog! (part 2)


Finished the Eduard Fw 190 A-5 - the 'old' new-tool 'weekend edition'  Obviously it is not designed to be built 'closed-up' (or even finished in a weekend!) but I did not want to leave it all open. I drew the line at filling, filing and sanding a second cannon-bay hatch and left the starboard wing-root door open. Some of the engine parts have to be mounted (somehow) inside the cowling panels in order to have the BMW fan correctly positioned.. 


The other point to mention about this kit is the poor 'sit' or 'stance' of the finished model - it definitely needs some tweaks to the gear legs. 


Finished as 'black 7' flown by the Staffelkapitän of 5./JG 54 - Lt. Emil Lang. During the late spring/ early summer of 1943 bands of earth brown/sand were roughly applied over the two greens and the unit's green heart markings were over-painted - not 100% convinced by the paint finish, it looks a little too neat to my eyes, but at this stage I was just happy to get something that looked reasonably 'presentable' on the shelf.. 


Some images from Huw Morgan's build of this kit - or rather the A-8/R2 boxing - that was featured in the now defunct 'SAMI' in 2015. I chuckled at the 'minimal filler' needed. There isn't one part of this kit that fits to another that doesn't require it! Obviously if you attempt this - I do have another in the stash -  you will encounter the same issues.


Thursday, 30 July 2026

Eduard 1:48 Fw 190 A - what a dog!


About 13 years ago now, the Czech model concern Eduard released their first new-tool Fw 190 in 48th scale. I've avoided it - until now. Recently I (perhaps rather naively) imagined that I could complete it to a reasonable level and call myself a 'real' modeller! I'm working on one at the moment and I can safely say that it will easily make it into my listing of the Top 10 worst model kits ever released. In fact I'd go further. It is quite possibly the worst kit ever manufactured and sold to the general public. Of course some people on model forums and in blogs actually maintain that they have built it - to which I would say, not as the model company intended you haven't! There are a whole range of fit issues with it - from the small 'triangular' part that you must align and glue behind the wheel well spar to the wing root gun bays and covers, the upper cowl MG mounts -far far too large- which clip into the upper wheel well part and are supposed to represent the ejector chutes to the horrible horrible (yes, twice for emphasis..) engine assembly - so bad Eduard provide a 'template' for you to align the individual exhaust stacks to the multi-part cowling. I could not even get the wings together properly. To get anywhere with the kit you must immediately deviate from the instructions - glue the fuselage halves together and then slide the completed cockpit in from underneath - the fuselage halves are so thin and flexible doing it this way is fairly straight forward.Obviously checking all the while that the forward cowl cover and windscreen will fit without leaving a 'lip'. The way the instrument panel is supposed to be located - 'clipping' into the coaming - is dreadful, especially as the coaming doesn't even touch the sides but there is not a lot that can be done here, aside from super glue and clamp. That's about as far as I've got with the kit at the moment and while I never bin anything, I'm seriously contemplating doing it with this one. I'd been saving this one up for a long time as well - 13 years. I've read all the reviews, collected all the advice, from Fridell and others. Even Eduard themselves issued a page of guidance to 'help' modellers with the build - and it still didn't work for me. Do they not perform test builds at the factory before unleashing stuff like this into the modelling world? Evidently not as they managed to completely screw up the first new-tool '48th' scale Me 109s they released as well. No wonder both their 48th scale 109s and Fw 190s had to be re-tooled!

This is part 1 of this build report - who knows whether there will be a part 2.   


yes, if you want everything 'opened up' just follow the instructions. But those cowl gun mounts will look rather ridiculous if you do leave them alone. Part I21 is tricky (see image above). There is no indication at all where this 'sits' - a bit of trial and error and test fitting with the cowl cover and windscreen is the only way to do it, otherwise it end up far too high as well.. 

Below; Even if you do use the cowl part closed up then you will need to retain the bulkhead I4 onto which your suitably amended magazines will still need to be mounted. The engine mount struts fit onto this part as well but I'm not feeling at all confident that the engine assembly will 'work' as per the instructions. Well the wings are assembled and some filler at the roots will be required. The MGs have to be inserted into the bays before the top wing goes on, which, once again, is not ideal!

Sunday, 6 March 2022

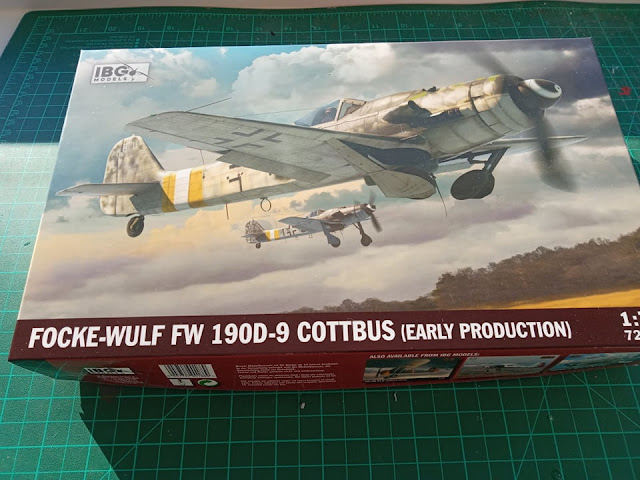
Build review IBG Models Fw 190 Dora-9 (Cottbus, early production) - finished


 ..first completion of 2022. IBG Models Fw 190 Dora-9. Great kit, loads of detail and options and fit was good for such a 'complex' kit. Finished as 'black 3' of 6./JG 26 with Xtracolor enamels.


A few views of the build, including the detailed cockpit and engine


Friday, 4 March 2022

.. building the IBG Models Fw 190 Dora-9 - in-box review/build Part 2


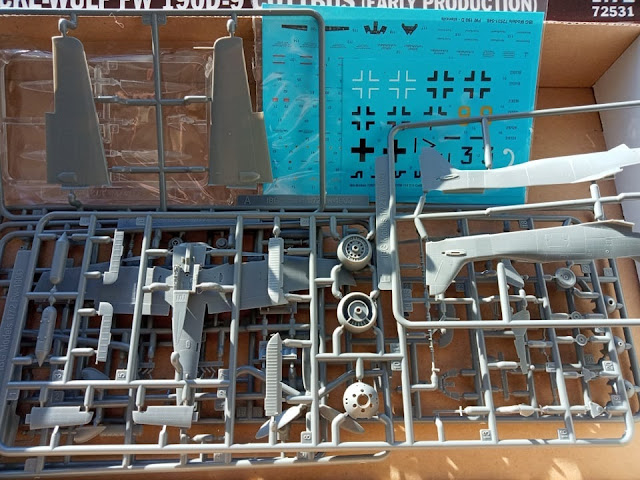
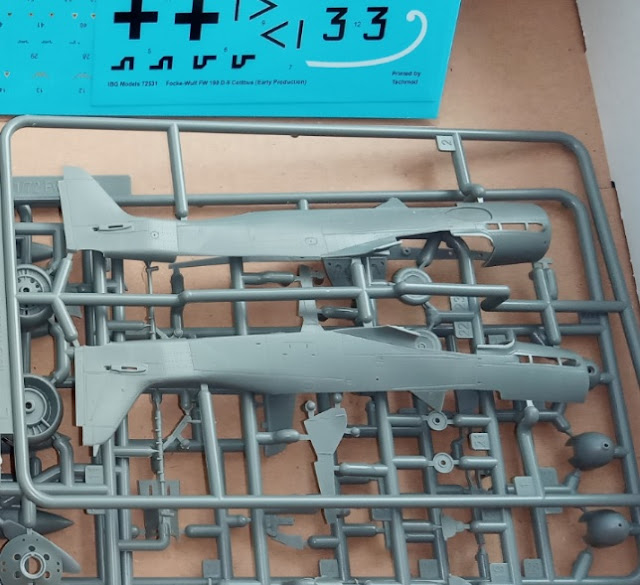
 The first new-tool IBG Models Fw 190 Dora-9 arrived a few weeks ago. The D-15 is released as well. I assume the D-11/13 is due later. A quick look at what's in the box. 


Part 1 of this build was posted on FalkeEins Luftwaffe blog here

The first half of the build involves construction of the cockpit and engine and the installation of these two components/elements into the fuselage halves.  Parts are so finely molded that this is all achieved in relatively straight forward steps. The trickiest stage of the build is removing the parts from the sprues and cleaning them up.

Once the fuselage halves are together the lower wing part clips into place and the firewall spar forms the back wall of the undercarriage wells. Again alignment is pretty hassle free. 


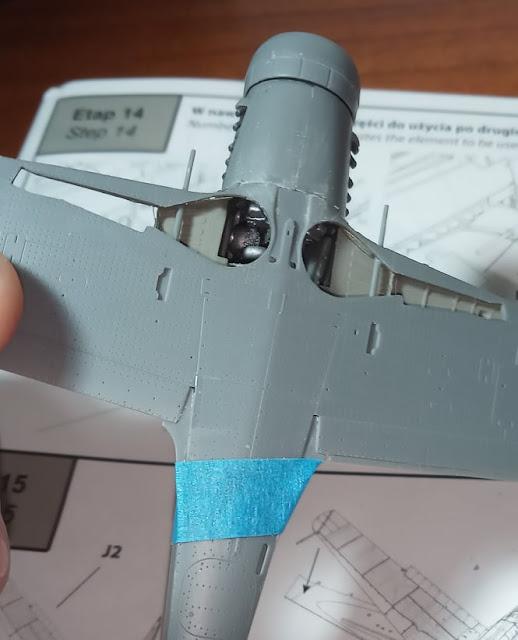
Stage 14 shows how the wells are built up with the photo etch parts, certainly the trickiest part of the build for me. 


A view of the completed wells which shows the 'see-through' effect as on the actual machine. The finely molded engine is more or less visible here, although the upper cowl MGs are not.


Prepping the completed build for painting. A little PPP required in the wing join. The control surfaces are all separate parts. There is a choice of four different canopy styles in the box - or are two of them spares?


The defence of the Reich bands are painted and masked and the RLM 76 applied (Xtracolor enamels) This view shows the superb rivet detail on the main parts -  the finish achieved by the mold maker. is superlative.  The flash has obliterated the pre-shading. 


Wednesday, 22 July 2020

Modelling nostalgia with the vintage FROG Focke Wulf Ta 152 H


I guess for those of us 'oldies' quite a lot of what we do in modelling nowadays is driven by 'nostalgia'. It has become something of trend on forums everywhere to revisit some of those golden oldies from the 1970s and 1980s; ‘a kit you built as a kid’ group build was running a while back on Britmodeller. I more or less remember tackling all of those kits in their day. Mainly because there wasn’t any internet and whatever the local newsagents or Woolworths had in stock was what you built back then. Although I always remember 'Airfix Magazine' arriving through the letterbox on Saturday morning each month and devoured Alan Hall's and Bryan Philpott's model builds - especially those Ju 88 nightfighter and Bf 109 conversions from Bryan Philpott. Of course parents and relatives were always ready to buy you a model kit since no doubt they saw it as a constructive way for a child to spent his time, same with books. No doubt one of the reasons why I've ended up with a huge collection of books ..and unbuilt models. I well recall building the Airfix 24 scale Harrier in about a fortnight aged twelve years old. I doubt if I could do anything like that today!

Still living the nostalgia. I saw a lovely thread elsewhere on BM where the modeller stated that what he liked doing was simply building what was in the box. No additions or new parts or vacuform canopy or after-market of any description - you just build what is in the box. Just to remind yourself how much fun it is not worrying about washes, detailing and all the other things we now tend to have to have these days in our modelling lives, living in an era of 'super' kits and hi-grade aftermarket.

But Airfix was the staple of those days and in the last couple of years before other interests took me away from the hobby around 1978/79 my passion was building Luftwaffe kits. This coincided with the discovery in the local library of William Green's massive "Warplanes of the Third Reich" book. It was a book full of exotic machines and far too valuable to be loaned out of the library - you were allowed to study it in a special room and I still recall spending at least one set of summer holidays taking copious notes from it into a small notepad - aged about 11 or 12. Well-known author and Classic Publications founder Robert Forsyth told me that his interest in the Luftwaffe was stimulated in similar fashion - but he actually got his mum to buy him a copy of 'Warplanes..' ! Who knew then that this huge tome would be so decried nowadays by the Experten.


Frog models featured a lot in my youth - their Blackburn Shark and Barracuda kits I remember well. One of the vintage kits I built back then was the 1970-release of the FROG Ta 152. I would have been around 10 or 11 when I first built this kit. Of course this original FROG kit has been re-boxed by Revell and is still easily available. I built mine a while ago but having a box of Eduard Fw 190 spare bits to hand I have been 'inspired' to do up my old FROG model.


This is the finished model. I've tried to update it a little. The engine cowl has had plastic card gill's added and a etch grille in the top section. The otherwise completely smooth nose and upper fuselage parts have been scribed and the canopy/late war head armour and wheels are Eduard left-overs. A gear bay has been built and gear retraction jacks added. along with foot-step and a FuG aerial. There is even a half-decent cockpit tub with side panels, instrument panel and control column in there. The armament has been replaced with metal rod. Aerial wire from GS-Hypo Cement - a new tube so very fine, barely visible. Decals from the Kagero "JG 301" Air Miniatures book - 'green 4' is the Stab./JG 301 machine supposedly flown by Walter Loos in the last few weeks of the war. Paints are Xtracolor and Colourcoats enamels - reading my reference it would appear that there is no known camouflage 'plan' for the Ta 152, but mine is taken from the Eagle Monarch book on the type, who incidentally don't feature Loos' 'green 4' but do illustrate an all-red machine, which in my view was probably an 'invention' of the vets for a little 'fun' at some-one's expense ...